How to Create a Mudroom
When the rain comes into Wine Country, we think about the mudroom in our Sonoma Family Home project. A mudroom doesn’t need to be huge, but with the right amount of planning it can be a small but mighty space that packs a lot of functional punch.


To make the most of the space we had, we divided the room into 4 zones: 1) Entry, 2) Storage, 3) Laundry, and 4) Sink. This allowed us to ensure we were making the most of every inch we had. Here are our tips to creating a great mudroom for your own family with some under-construction “before’ photos…

Storage, Storage, Shoe Storage
We recommend filling up as much wall space as possible with built-in storage (or pre-made cabinets that you can purchase and install) with lots of areas for coats and gloves and scarves and umbrellas. A few slots for shoe storage at the bottom for those rainy days makes it easy to quickly set aside wet and muddy footwear.

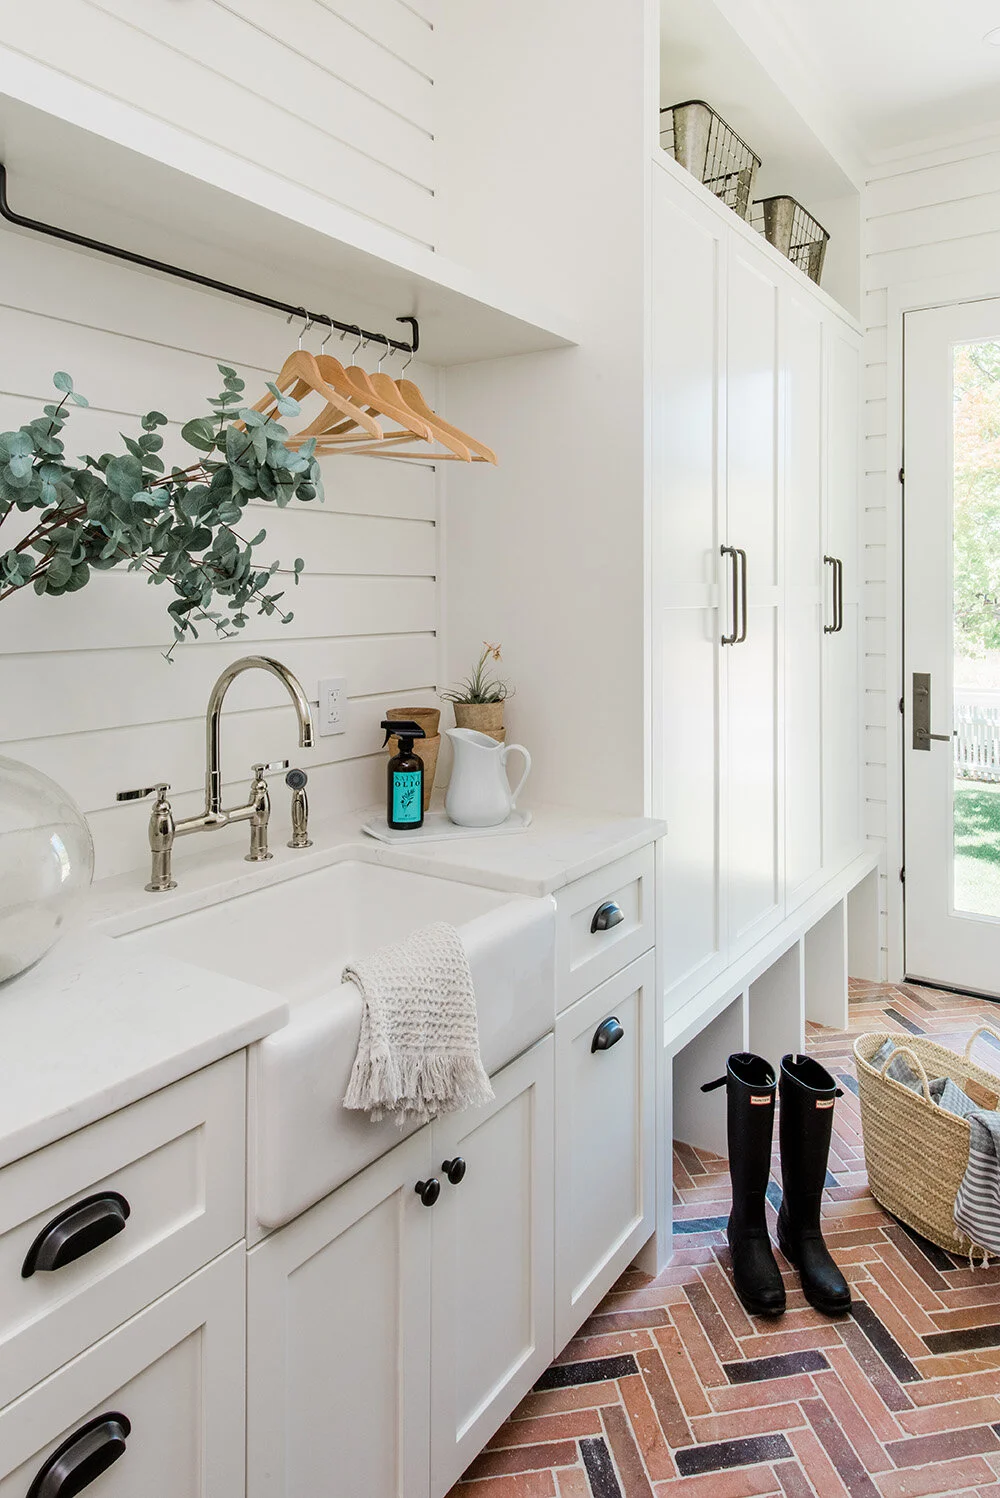
Easy-to-Clean (and Hide) Flooring
When creating your mudroom, opt for flooring that is both easy to clean and easy to hide messy footprints if you don’t have a chance to clean it up right away. We created this pretty yet practical herringbone red brick flooring with a thick clear sealant on top to keep the dirt on the surface, making it even easier to clean.

Coat Hooks & Natural Lighting
The “Entryway” zone makes it easy breezy to waltz in and remove any coats and hats without having to search for a lightswitch. With such a tight space, a glass door also prevents a family member from swinging the door open onto another member while they’re in transition.

For the mud…Sink with Ample Countertop
For the “Sink” zone, we made sure to create a workspace ready for the messes that may need attention. With countertop on both sides, overhead lighting, and easy-access drawers, we didn’t waste an inch. And if you look at the “after” photos at the top of this post, you’ll notice we even hung a bar under the shelf for coat hangers.
Do you have a mudroom in your home? What’s your favorite thing about your space?
KEEP UP WITH FLETCHER RHODES